UP2You Turns Scattered Photos into a 3D Human Model Without Fine-Tuning
If you've ever tried to build a 3D avatar from photos, you probably remember the main requirement of most pipelines: perfect lighting, static pose, and shooting from all sides in one session. Step to the left, different lighting, or a blurred background — and neural networks like NeRF or Gaussian Splatting produce a mess of artifacts.
I recently came across a fresh UP2You repository, prepared by the authors for the ICLR 2026 conference. The project solves this unpleasant problem. It takes an ordinary batch of photos from a smartphone gallery, where a person was shot on different days, under different lighting, and from different angles, and quickly reconstructs a ready 3D mesh. Without lengthy fine-tuning for a specific person.
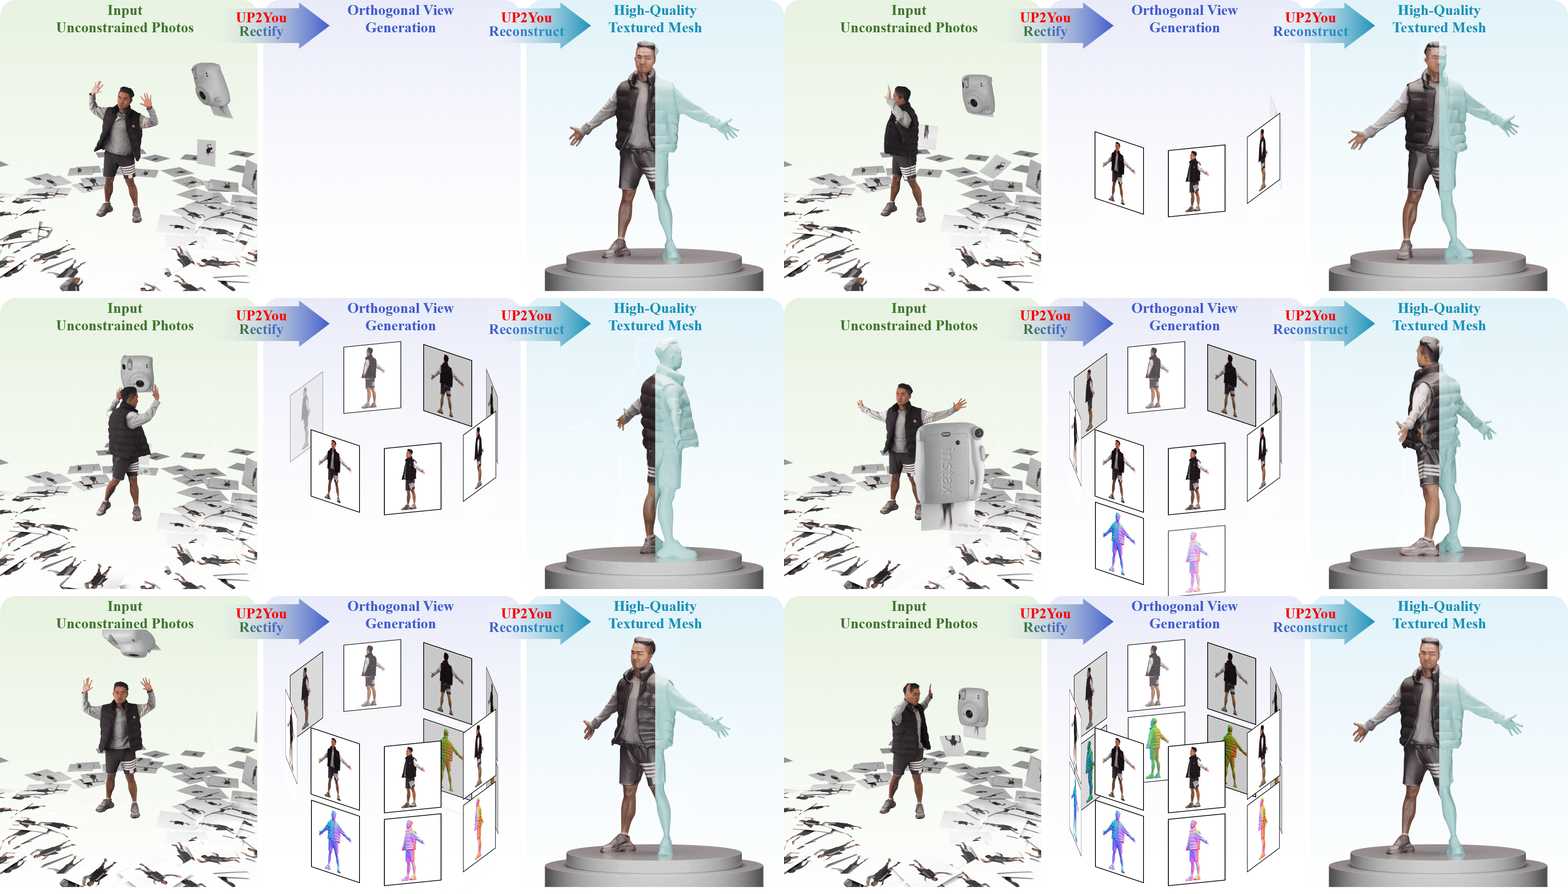
What is the main difficulty with such reconstructions
When we feed real-world frames (unconstrained photos) to algorithms, the math of classical 3D reconstruction methods breaks down. In one shot the sun shines from the left, in another — an incandescent lamp from above. In the third frame the background is blurred by bokeh, and the pose has changed entirely.
Most existing solutions require fine-tuning weights for a specific person (per-scene optimization). This takes from tens of minutes to several hours on a decent GPU.
The authors of UP2You focused on the tuning-free category. The model is trained in advance on large datasets of 3D scans and learns to generalize body geometry and textures, filtering out environmental noise and lighting inconsistencies. You provide a folder with heterogeneous photos as input, and get a mesh in a couple of minutes as output.
How the project stack is organized
Under the hood, the architecture relies on a combination of generative diffusion models and 3D geometry libraries.
- Human segmentation. The project uses BiRefNet as the default tool. This is a separate model for high-precision cutting out a human silhouette from a complex background.
- Generative foundation. The project relies on Stable Diffusion 2.1 base weights combined with multi-view adapters, borrowing ideas from MV-Adapter, PuzzleAvatar, and PSHuman projects. Diffusion helps complete the areas invisible in the photos and align the overall appearance of the character.
- Geometry engine. For working with meshes and 3D representations, the authors used Kaolin from NVIDIA and PyTorch3D.
The repository includes a script inference_low_gpu.py right away, so you can run generation even on consumer GPUs with a relatively small amount of VRAM.
Installation and running
The pipeline is strict about library versions, so it's best to install strictly following the instructions via Conda.
First, clone the project and create a virtual environment with Python 3.10:
git clone https://github.com/zcai0612/UP2You.git
cd UP2You

conda create -n up2you python=3.10 -y
conda activate up2you
Then install PyTorch 2.4.1 with CUDA 11.8 support and the Kaolin module:
pip install torch==2.4.1 torchvision==0.19.1 torchaudio==2.4.1 --index-url https://download.pytorch.org/whl/cu118
pip install kaolin==0.17.0 -f https://nvidia-kaolin.s3.us-east-2.amazonaws.com/torch-2.4.1_cu118.html
pip install -r requirements.txt
For building PyTorch3D, the authors recommend taking a pre-compiled archive:
conda install -y libffi==3.3
wget https://anaconda.org/pytorch3d/pytorch3d/0.7.8/download/linux-64/pytorch3d-0.7.8-py310_cu118_pyt241.tar.bz2
conda install pytorch3d-0.7.8-py310_cu118_pyt241.tar.bz2
Model weights are downloaded from Hugging Face via CLI:
hf download Co2y/UP2You --local-dir ./src
mv ./src/human_models ./
mv ./src/pretrained_models ./
rm -rf ./src
When the environment is ready, just put the photos in the folder examples and call inference:
python inference_low_gpu.py \
    --base_model_path Manojb/stable-diffusion-2-1-base \
    --segment_model_name ZhengPeng7/BiRefNet \
    --data_dir examples \
    --output_dir outputs
Or simply run the bash script bash run.sh.
What to pay attention to
The project is still fresh, it has about 380 stars on GitHub and a custom license. The documentation in the repository is concise, without a detailed description of the input data format, but the inference code is easy to read.
If you decide to experiment, keep in mind the segmentation quality. If BiRefNet poorly separates the background (for example, the person blends with the wall or there are other people in the photo), this will directly affect the final mesh. It's better to select photos where the person is visible in full body or at least from the waist up.
Who will find it useful
The project is worth checking out for game developers and 3D artists who need a quick draft mesh of a real person for further rigging and sculpting. The repository will also be interesting for ML engineers exploring 3D avatar generation and multi-view diffusion pipelines. The code doesn't yet offer a full replacement for studio photogrammetry, but as a way to assemble a recognizable 3D image from ordinary photos in a couple of minutes, it works great.
Progetti correlati